
Here is a posting guide I put together to hopefully explain the process of scheduling social media posts using Sendible, at least how I’ve figured it out so far!
There wouldn’t be so many steps if Facebook and Instagram weren’t so fascist, but alas.
If any of this is unclear, feel free to ask me about it in Twitter, or better yet, Discord!
Sendible Posting Guide
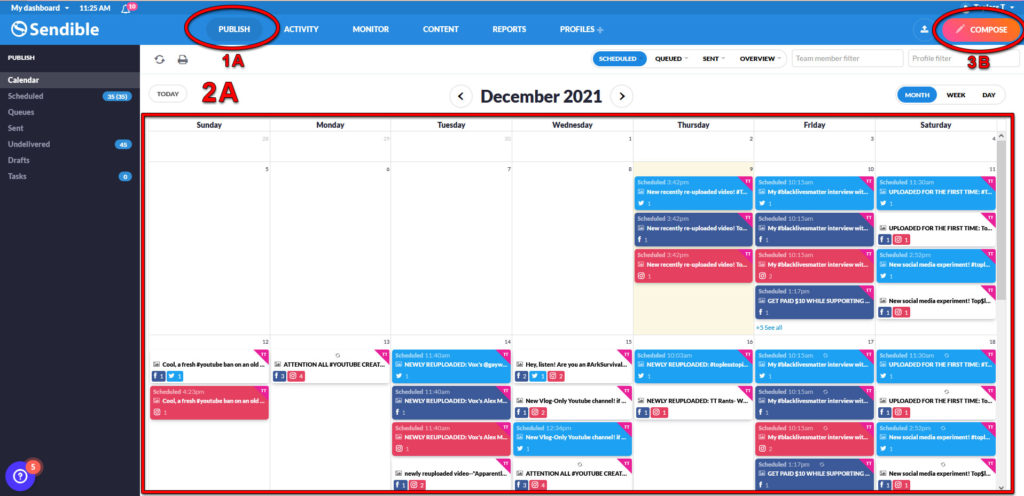
- Log into Sendible and [1A] make sure you’re on the PUBLISH tab
- [2A] Look at existing scheduled posts and pick a period with no posts currently scheduled—such as (in the example) Thursdays before 3:40, Fridays after 3, etc. (Try to keep Saturdays around 3pm free so more people see my “now livestreaming!” posts)
- After deciding on a day and time that is relatively empty, [3B] click the COMPOSE button
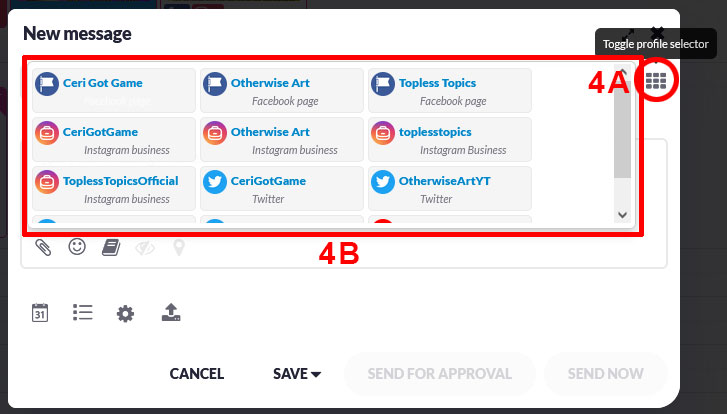
4. In COMPOSE/NEW MESSAGE dialog box, [4A] click the 3×3 gray box icon for the PROFILE SELECTOR box, then [4B] CLICK all appropriate account boxes—for Topless Topics posts, this is “Topless Topics Facebook Page,”
“toplesstopics IG page,” “toplesstopicsOfficial IG page,” and “ToplessTopicsUP Twitter account.”
VERY IMPORTANT: Twitter blocks accounts with the same text from posting at the same time, and Sendible does not have an easy way to stagger Twitter messages (short of making a new Compose post every time). So post to ToplessTopicsUP ONLY, then I have to log in and manually RETWEET the same tweet from @toplesstopics (my main account)
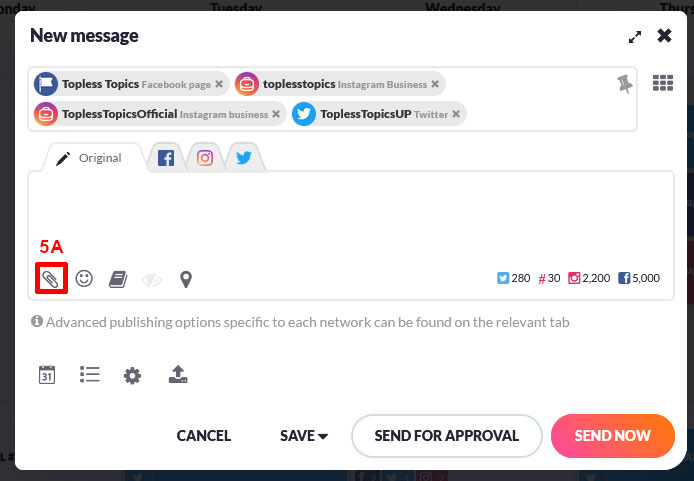
5. After selecting PROFILES, [5a] click GRAY PAPERCLIP for “Attach images and videos”.
VERY IMPORTANT: To lessen chances of getting banned again for heinous female nipples, plan FIRST for heavily censored version of images for Facebook and Instagram, THEN switch out censored to non-censored version for Twitter.
NOTE ABOUT WHICH IMAGES TO USE:
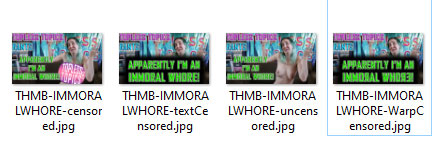
“[videotitle]-WarpedCensored” will have everything chin-down blocked by text with a huge drop shadow, as well as random characters in any algorithm-risky words like “topless” flipped around to hopefully make it harder to ban. This image should be used for Facebook and Instagram posts.
“[videotitle]-textCensored” has everything chin-down censored by text with a drop shadow, but letters are not flipped. Use this for Youtube thumbnails and website page previews.
“videotitle]-uncensored” is, obviously, uncensored. Use for Twitter posts and video thumbnails on TROM.
“[videotitle]-PastieCensored” is no longer used—I was covering my chest with a giant digital pastie, but even these were getting banned, thanks to stupid fucking haters exploiting stupid fucking algorithms and FB/IG’s nonsense rules that “nudity cannot be hidden by objects such as a guitar or bowl of fruit”.
6. In ADD MEDIA dialog box, select UPLOAD FILE tab on the left, click BROWSE FILES and upload the CENSORED version of the thumbnail first (no image, cuz it should be obvious what to click)
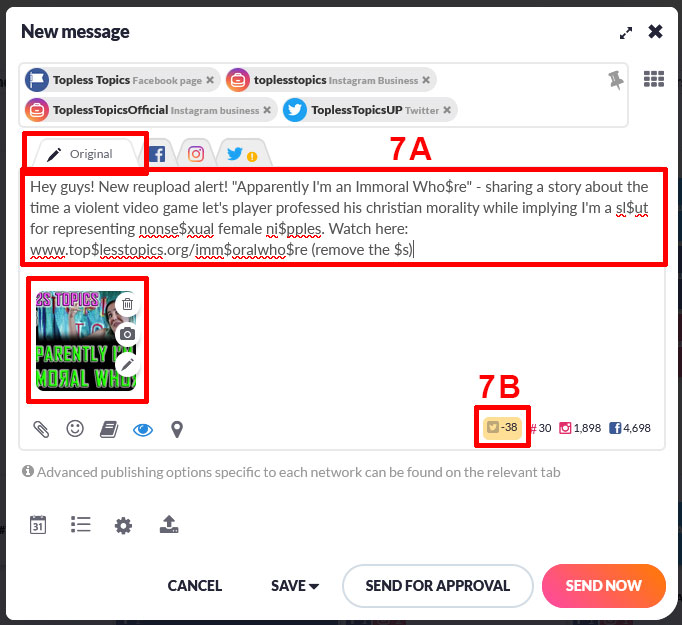
7. In ORIGINAL tab (which is what the post will start with—then you can make platform-specific changes in the appropriately named tabs), [7A] type the description for the post. Word it how you like, but make sure to include the URL for the post. Note that Instagram will not turn the URL into a clickable hyperlink.
- IT’S IMPORTANT TO UPLOAD THE IMAGE FIRST, so that Facebook does not automatically generate a preview image for the post, which can and will get the post banned if Facebook decides the preview image isn’t de-boobified enough (white nationalism and antivaxxers are totes fine, tho) ALSO NOTE to put some kind of breaks in algorithm-risky words in the description themselves, and hope that viewers can figure out what to type, e.g. “top$less” instead of “topless.” Outright replacing characters like “tople$$” still seems to trigger censors. Currently, I don’t have a redirect website set up yet, so there’s no way to break up the “topless” in the website url. So either we risk having the URL in anyway (as long as we upload the image first, so no offensive nipple-containing preview thumbnail is automatically generated), or break it up as in the description and hope people figure it out (e.g. “video is at www.top$lesstopics.org/periodshame – remove the $”)
- [7B] The bottom right displays the character count for the post, and how close it is to the limit for that platform. Unless your description is SUPER long, you can ignore the Twitter character limit for now—we’ll adjust the Twitter description in Step 8.
- Click on the Facebook and Instagram tabs and check one more time that (a) the image used is the WarpedCensored version, and (b) any algorithm-risky words are broken up with a symbol like $ (and that spaces are used to break up URLs so they don’t auto-hyperlink). If you’re not sure if a word is algorithm-risky, break it up just in case.
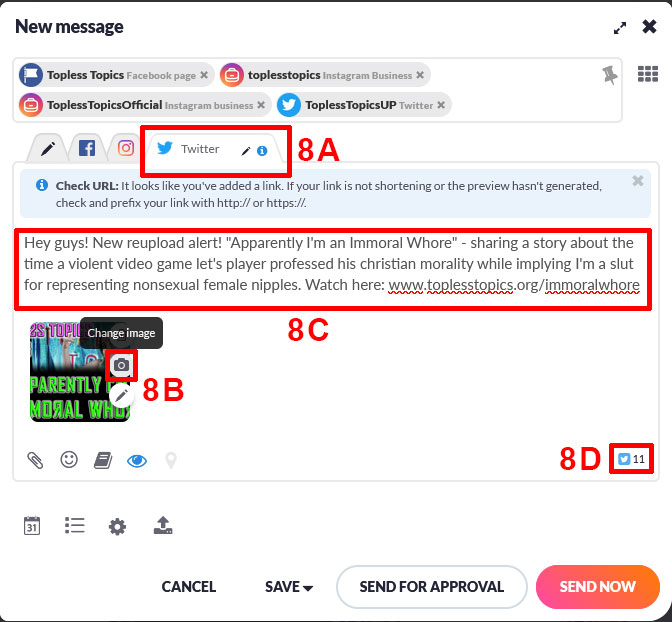
8. [8A] Click on Twitter tab, then replace/adjust information accordingly:
- [8B] Click the GRAY CAMERA icon to “change image,” then UPLOAD the “[videotitle]_uncensored” version of the video thumbnail.
- [8C] Take symbol censoring out of algorithm-risky words, and remove spaces to turn the URL into a clickable hyperlink.
- If the post is still over Twitter’s character limit after removing the censorship, you will have to edit it down further until the number in [8D] is no longer displayed in the negative. If there is important information you still think should be included with the post, you can post it afterward as a reply tweet, but this is a pain in the ass and not generally necessary.
- BEFORE POSTING, MAKE SURE THAT YOU EDITED THE “TWITTER” TAB ONLY, not the “original,” “Facebook” or “Instagram” tab. Otherwise the post will get banned!!
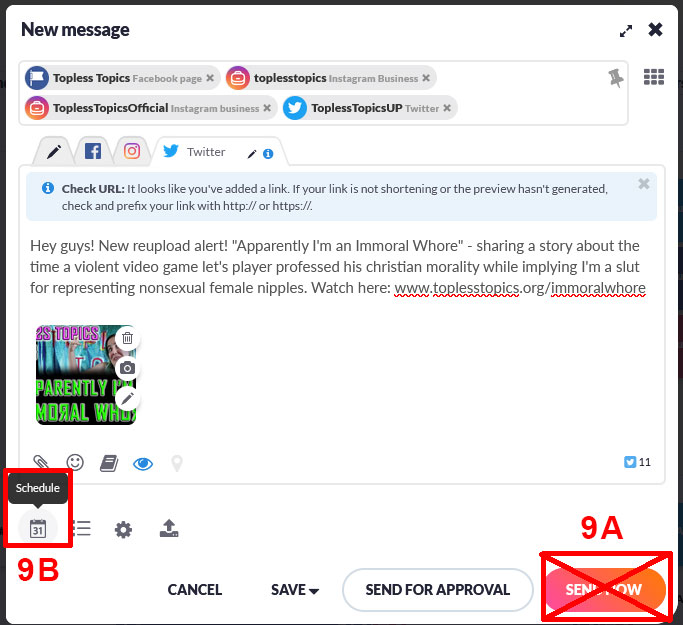
9. Unless this is a single-time post, such as an announcement that an unplanned livestream has started, [9A] DO NOT HIT “SEND NOW”. We are going to schedule this post to repeat several times first.
- [9B] Instead, click the GRAY CALENDAR to “schedule” the post so that it repeats a few times.
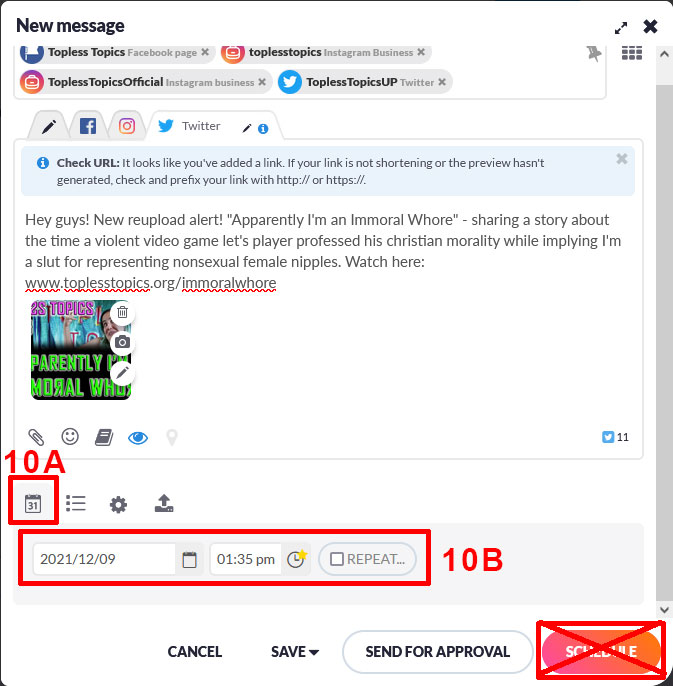
10. Clicking [10A] SCHEDULE will expand the New message dialog box to include [10B] new fields: the first post date, the first post time, and a checkbox to repeat. [10C] The Clock symbol next to the post time will select a random time that is allegedly a good time to post, based on algorithms—don’t use this, use the time window you determined at the beginning of the posting process (Step 2).
11.
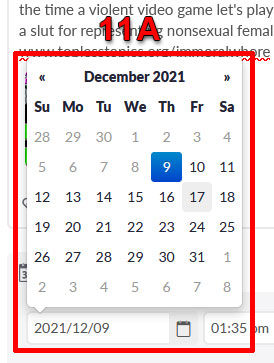
- [11A] After clicking the SCHEDULE button, a box containing the days of the current month will display. The date selected will be the date you are creating the post. Click the appropriate day to select the date you actually want to post on (for instance, if making the post on Th the 9th but you want the post to show up Fr the 10th, simply click on Fr the 10th)
- [11B] Then, click the box with the time in it and a new box with different times will expand. Type in (ignore the scroll box) the time that you wish to have the post go live—for instance, if the next big gap between posts is Fridays between 10am and 3pm, pick some time in that window, say 1:13 pm. Non-exact times are more likely to show in timelines as algorithms think they’re less likely to be scheduled, such as 1:13 instead of 1:00 or 1:30. Finally, click the check box next to REPEAT [11C]

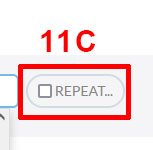
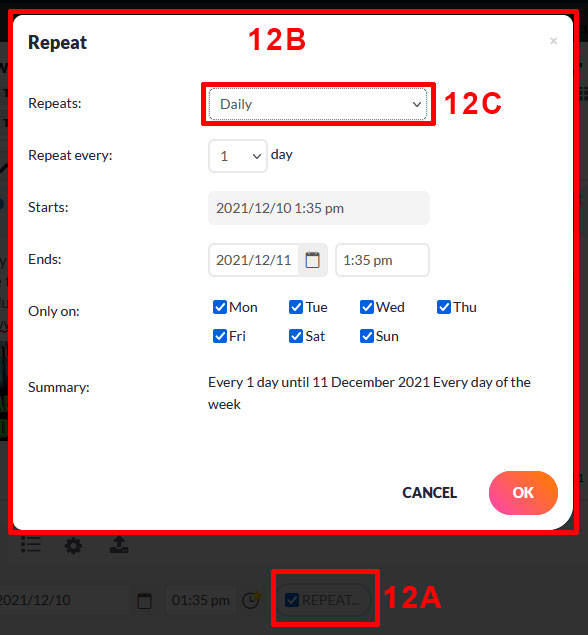
12. After clicking the checkbox next to REPEAT [12A], a new dialog box will show up [12d].
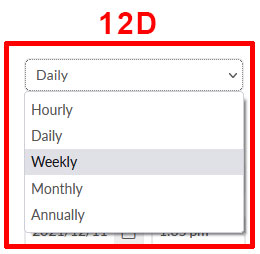
- Click the DAILY option and change it to WEEKLY [12C > 12D]
13.
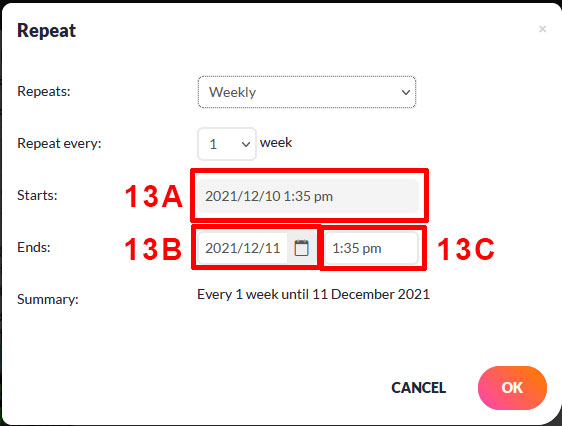
- [13A] After changing to WEEKLY, the “Starts” field will be grayed out and unable to be changed. This is what you set on the lower part of the New message dialog box in Step 12, before you clicked REPEAT.
- Now, you will select the day the post will STOP REPEATING, [13B] first the day and [13C] then the time.
14.
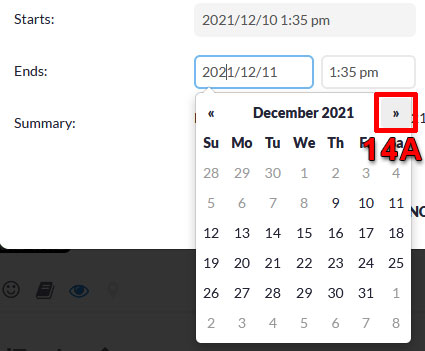
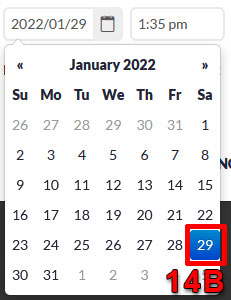
- [14A] When setting the end date, you will have to click ahead to the month then day that you wish to stop repeating the post. I usually give each new video post about a month, repeating each week on the same day. For instance, in the example I’m posting the Immoral Whore new video upload post starting on Friday the 9th of December, [14B] so I’ll click the double arrows until I reach January and will select January 29th, 31 days past the start date. You want 31, not 30, because the post will END before the date and time selected comes to pass—so if you select Jan 28th instead of Jan 29th, the post will not appear that week at all.
- After selecting the date that is 31 days ahead, you can leave the posting time under ENDS alone.
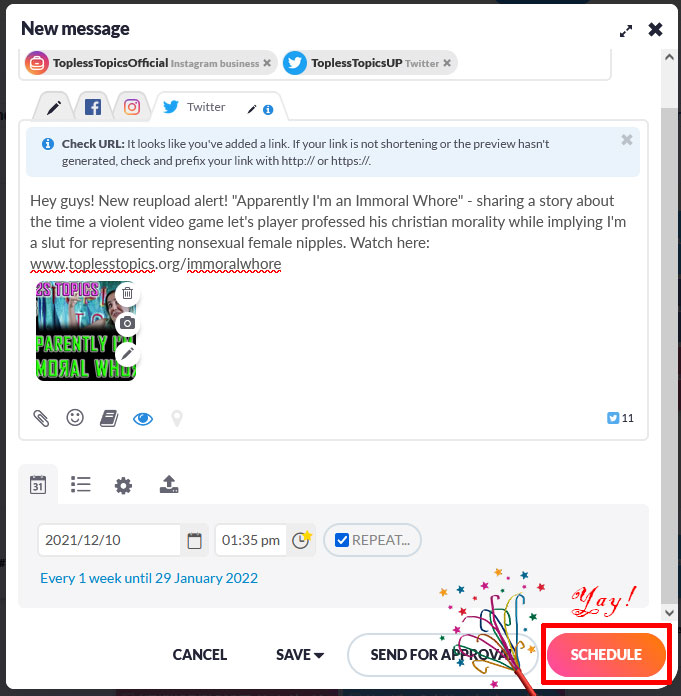
15. At long last, you’re (almost) ready to click SCHEDULE and be finished setting up this post! First, go through the platform tabs and check one more time that there are no female nipples (or even a pastie OVER female nipples) showing in the uploaded images for Facebook or Instagram, that all algorithm-risky words on Facebook and Instagram are obscured with a symbol like $ and that URLs are broken apart, and that you have set the post on REPEAT with the post repeating WEEKLY and ending on the date 31 DAYS from the start, then click “SCHEDULE”! Wahoo!
Congrats, you’ve just scheduled a repeating “new video alert!”
Now just repeat this process about ten times a day, every day for the rest of your life. To say nothing of trying to keep up with the numerous inboxes and DMs, plus actually uploading the videos (repeatedly, as accounts get banned), plus actually recording and editing the video….and yet, they insist being the sole creator of an online video series is “a super easy job.” 😀